Connecting SATA Hard Drives: A Comprehensive Guide
Intro
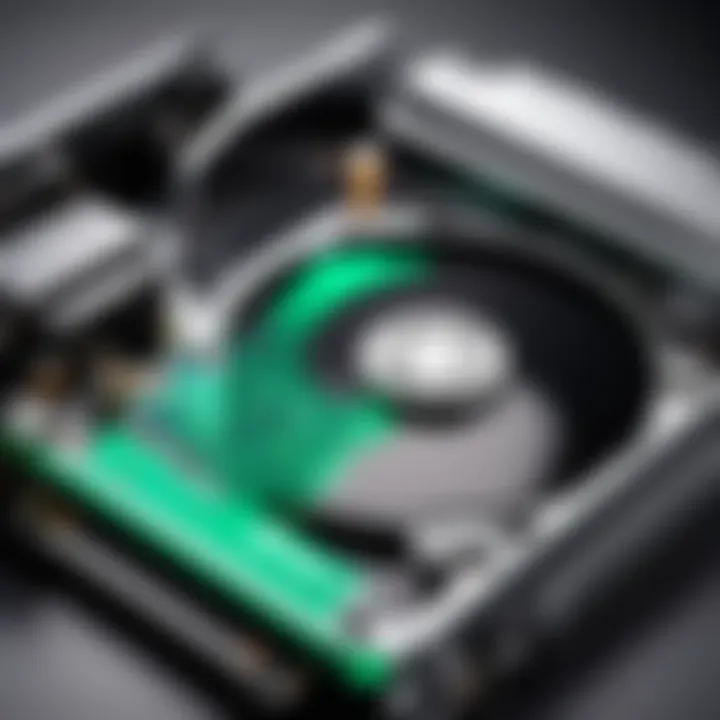
The evolution of storage technologies has led us to the moment we are in today, where Serial ATA (SATA) hard drives are predominant for both personal and professional use. Understanding how to connect these drives is crucial for anyone looking to optimize their computer systems. This guide aims to demystify the intricate details of SATA connections, ensuring users can navigate both the installation and management processes effectively. From recognizing the SATA interface's benefits to troubleshooting common issues, the following sections will prove invaluable.
Product Overview
SATA hard drives are designed to streamline the process of data transmission between hard drives and motherboards. These drives come in various capacities and speeds, making them suitable for a wide array of applications—from basic file storage to intensive multimedia processing.
Description of the product
SATA hard drives have largely replaced the older Parallel ATA technology due to their enhanced speed and efficiency. Generally, they connect through a distinct SATA cable, which is thinner and more flexible than previous IDE cables. This design not only improves airflow within a computer but also simplifies installation.
Key features and specifications
- Transfer Rates: SATA III, the latest version, boasts a maximum transfer rate of 6 Gbps, significantly improving data access speeds.
- Hot Swappable: Many SATA drives support hot swapping, allowing users to replace or add drives without shutting down the system.
- Compatibility: SATA technology provides backward compatibility, meaning newer drives can still connect to older interfaces, albeit at reduced speeds.
- Form Factors: SATA drives are available in various form factors, with 2.5-inch drives commonly used in laptops, while 3.5-inch drives are typically found in desktops.
In-Depth Review
While selecting a SATA hard drive, both performance and usability are paramount. Understanding these aspects ensures that users select the right drive for their needs while optimizing their overall computing experience.
Performance analysis
The performance of SATA hard drives is measured not just by their speed but also by their reliability and data integrity. Benchmark tests often place SATA drives almost on par with more advanced technologies like SSDs in certain scenarios, particularly with respect to read/write speeds under normal usage conditions.
Usability evaluation
User experience with SATA drives tends to focus on installation ease and software interaction. The straightforward design of SATA connectors simplifies the physical installation process, while matching connectors on motherboards ease the technological integration.
"Understanding the nuances of SATA connections can lead to significant improvements in your computing efficiency and reliability."
Understanding SATA Technology
In today's digital landscape, the way we connect and manage storage devices greatly impacts overall system performance and efficiency. The significance of understanding SATA technology cannot be overstated, especially as it underpins much of the current personal and enterprise storage infrastructure. This section provides insights into various aspects of SATA technology, including its historical evolution, distinctions from older technologies like IDE, and the specifics of its versions.
History of SATA
SATA, or Serial Advanced Technology Attachment, emerged in the early 2000s as a response to the limitations of ATA (Advanced Technology Attachment) interfaces. The introduction of SATA was a crucial turning point in data transfer technology, addressing issues such as cable management and transfer speed. The main goal of SATA was to provide faster data transfer rates and improved reliability over its predecessors. Initial releases of SATA promised speeds of up to 1.5 Gbps, which was significantly higher than what was achievable with IDE.
How SATA Differs from IDE
SATA differs from IDE primarily in its data transfer method and cable structure. IDE uses a parallel interface that can lead to data congestion since multiple signals travel along the same wire. In contrast, SATA employs a serial connection, allowing for a single data stream that reduces interference and increases speed.
Another critical distinction is the physical connectors. SATA connectors are much smaller and more compact than their IDE counterparts, which leads to better airflow within the computer case. This can contribute to overall system cooling—a significant concern in high-performance environments. Moreover, SATA also supports hot-swapping, allowing users to replace drives without shutting down the system, a feature that IDE does not offer.
SATA Versions Explained
The evolution of SATA technology is marked by three key versions: SATA I, SATA II, and SATA III. Each version has brought improvements in data transfer rates and functionality.
SATA
SATA I debuted in 2003, introducing a maximum transfer rate of 1.5 Gbps. This significant upgrade from the traditional IDE was well-received, establishing SATA as the new standard for connecting hard drives. Its primary characteristic was the simplified cable structure, making connections less cumbersome. This version's advantage was its ease of installation and enhanced signal integrity. However, the limited transfer speed soon became a bottleneck as software and storage needs grew.
SATA
Released in 2004, SATA II improved upon its predecessor by increasing the maximum transfer rate to 3 Gbps. This version also introduced features like Native Command Queuing (NCQ) and an improved power management system, making it a popular choice for mid-range storage solutions. The higher speed reduced data transfer times, making operations smoother in intensive applications. Still, it faced limitations as the demand for even faster storage became evident.
SATA
The most advanced standard, SATA III, was launched in 2009 with a maximum data transfer rate of 6 Gbps. This version allowed for greater performance and efficiency, catering especially to SSDs which required faster speeds to optimize their potential. With backward compatibility, SATA III can connect with SATA I and II devices, making it a flexible option for upgrading existing systems. Its notable features include improved error correction methods, enhancing data reliability. Although SATA III represents the current standard, the continuous push for speed encourages discussions about the future of storage interfaces.
"Understanding the underpinning technology of SATA is critical for making informed decisions regarding hardware upgrades and system configurations."
Understanding these elements of SATA technology provides a solid foundation for the subsequent sections of this guide, where we will explore practical applications, installation instructions, and broader implications for storage solutions.
Types of SATA Drives
Understanding the different types of SATA drives is essential for making informed choices when upgrading or configuring a computer system. Each type offers unique characteristics, advantages, and considerations. Knowing these factors can significantly impact performance and the user experience. Choosing the right drive type can optimize storage solutions based on specific needs.
SATA Hard Disk Drives (HDD)
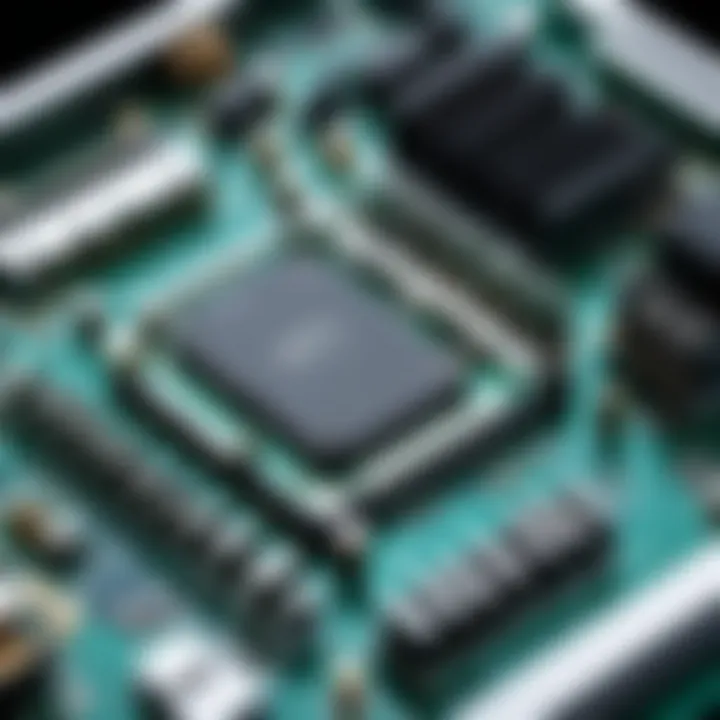
SATA Hard Disk Drives, commonly known as HDDs, are traditional storage devices that utilize spinning disks to read and write data. They have been a cornerstone in data storage for many years. The primary advantage of HDDs is their larger storage capacity at a lower cost. This makes them ideal for bulk data storage, such as databases, large files, or general-purpose storage.
However, there are downsides to consider. HDDs have slower data access speeds compared to SSDs, which can affect system performance, especially when loading applications or transferring large files. Despite this, they still offer a reliable solution for users who need large storage space without breaking the bank.
SATA Solid State Drives (SSD)
SATA Solid State Drives represent a significant advancement in storage technology. Unlike HDDs, SSDs use flash memory to store data, resulting in faster access times and enhanced performance. This speed comes with benefits; for instance, booting up the operating system, launching applications, and loading files happen in mere seconds.
However, the primary limitation of SSDs is their cost per gigabyte, which tends to be higher than that of HDDs. Therefore, users often find that while they can benefit from the speed of SSDs for their operating system and frequently used applications, pairing them with HDDs for additional storage can provide a balanced solution.
Hybrid Drives
Hybrid drives combine the attributes of both HDDs and SSDs. They typically include a traditional spinning disk along with a smaller solid-state cache. This design allows frequently accessed data to be stored on the SSD portion, resulting in almost immediate access while retaining larger storage capacity on the HDD side.
The benefit of hybrid drives lies in their versatility, as they offer a compromise between the large storage capacity of HDDs and the speed of SSDs. However, it is essential to note that hybrid drives may not match the pure performance of standalone SSDs. Users should evaluate their specific needs and typical usage patterns before deciding on hybrid drives over other options.
Hybrid drives serve as a bridge between performance and capacity, making them suitable for diverse applications, from gaming to general computing.
In summary, each type of SATA drive caters to distinct storage requirements. Understanding their characteristics is crucial for optimizing your computing experience. Whether you prioritize speed, storage capacity, or a balanced approach, there is a SATA drive that can meet your needs.
Preparing for Installation
Preparing for installation is a crucial step when you decide to connect SATA hard drives. The process ensures that all components work together seamlessly. Proper preparation reduces the likelihood of encountering issues during the installation. It also helps you understand what is required to accomplish the task efficiently. This article will delve into several key areas that will aid in a smooth installation experience.
Required Tools and Materials
Before you begin, gathering the necessary tools and materials is vital. Below is a concise list of what you will need:
- SATA Hard Drive: This could be an SSD or HDD, depending on your needs.
- SATA Data Cable: Ensure it is compatible with your drive and motherboard.
- Power Connector: Most SATA drives use a standard Molex power connector.
- Screwdriver: A Phillips-head screwdriver is typically needed for mounting screws.
- Anti-Static Wrist Strap: This can protect components from electrostatic discharge.
Having these items on hand will streamline your process. For those new to installation, checking compatibility between components before obtaining tools saves time and effort. It prevents last-minute runs to the store which can be frustrating.
Safety Precautions
Safety is a paramount consideration during installation. Physical and data safety should be top of mind. Here are some essential precautions to follow:
- Unplug the System: Always disconnect the power supply before opening your computer case.
- Wear Anti-Static Gear: An anti-static wrist strap prevents damage to sensitive components by grounding yourself.
- Work in a Clear Area: Make sure your workspace is free of clutter and any liquids that could cause accidents.
- Handle Drives with Care: SATA drives are sensitive. Avoid dropping or applying excessive force on them.
Important: Failure to adhere to safety precautions can lead to damaged components or data loss. Take your time with these steps.
Installing a SATA Hard Drive
Installing a SATA hard drive is a critical step in setting up or upgrading a computer system. This section aims to provide a detailed overview of the installation process, including key considerations and benefits of a correct setup. A proper installation not only ensures the drive functions effectively but also prolongs its lifespan and optimizes the overall performance of your system. With SATA’s popularity and technical advantages, knowing how to properly install your drive contributes significantly to a seamless computing experience.
Locating the SATA Ports
The first step in installing a SATA hard drive is locating the SATA ports on your motherboard. Typically, these ports are found along the edge of the motherboard, often grouped together. They usually feature a distinctive L-shape that corresponds with the cable connector. Each port is numbered, which aids in identifying and organizing connections.
- Identify the Motherboard Layout: Refer to the motherboard manual for a clear diagram showcasing where the SATA ports are positioned.
- Check Compatibility: Ensure the motherboard supports the drive generation. SATA III is the most common today, but previous versions such as SATA II may still be in use.
- Clear View: If your system is pre-built or densely packed, ensure you have a clear view. You might need to remove cables or components to reach the ports easily.
Connecting the Power and Data Cables
After locating the SATA ports, the next phase involves connecting the power and data cables. Each SATA hard drive requires two connections: a power cable from the power supply unit (PSU) and a data cable that links the drive to the motherboard.
- Power Cable: The SATA power cable is wider, usually with 15 pins. Make sure it fits snugly into the drive's power connector.
- Data Cable: The SATA data cable is thinner, containing seven pins. Insert one end into the hard drive and the other into an available SATA port on the motherboard.
- Check for Secure Connections: Ensure that both cables are securely attached. A loose connection can lead to detection issues when powering on your system.
Mounting the Drive
Mounting the SATA hard drive properly is necessary to ensure stability and protection against damage. This process typically involves securing the drive into a designated bay within your computer case.
- Select the Right Bay: Most cases come with dedicated hard drive bays. Identify the appropriate size, as 3.5-inch drives require larger mounts compared to 2.5-inch drives, often used for SSDs.
- Use Screws: Align the drive’s mounting holes with the bay and use screws to secure it. It's common to use four screws for stability. Avoid overtightening as this can cause damage.
- Configure Additional Drives: If adding multiple drives, organize them logically based on use. SSDs should ideally be on faster SATA ports for improved performance.
Properly mounting your SATA hard drive not only ensures physical safety but also enables efficient airflow and cooling within your system.
Configuring BIOS Settings
Configuring BIOS settings is an essential step when connecting SATA hard drives. The BIOS, or Basic Input/Output System, serves as the firmware interface between your computer's hardware and its operating system. Proper configuration can ensure that your new SATA drive operates at its best capacity and integrates smoothly with the existing system.
Benefits of BIOS Configuration
Adjusting BIOS settings impacts several areas:
- Drive Detection: Ensuring that the system recognizes the newly installed SATA drive.
- Boot Sequence: Configuring the boot order allows your system to prioritize which drive to load first during startup.
- Performance Optimization: Specific settings might enhance performance, such as enabling AHCI mode for SSDs.
Understanding these elements allows users to tailor their system's behavior according to their unique needs, especially if running multiple drives or specific applications.
Accessing BIOS
Accessing the BIOS setup can vary by manufacturer, but typically it requires pressing a key during the boot process. Common keys include F2, Del, or Esc. Here are general steps to follow:
- Start or Restart Your Computer: Begin the process by restarting your computer.
- Watch for the Splash Screen: As the system powers on, a splash screen will usually display.
- Press the Right Key: Hit the indicated key repeatedly until you enter the BIOS setup.
If you miss the window, just restart and try again. The process may differ slightly based on your motherboard, so consulting your motherboard manual is wise.
Tip: When in doubt, search the manufacturer's documentation for the correct method to access the BIOS.
Verifying Drive Detection
Once in the BIOS, it is critical to verify that the SATA drive is detected. Follow these steps:
- Navigate to the Storage Section: Look for a tab labeled 'Storage', 'Drives', or 'Main'.
- Check for the Drive’s Name and Size: The connected SATA drives typically appear here, along with their storage capacities.
- Examine SATA Mode Settings: Ensure the configuration matches your drive type (e.g., AHCI for SSDs or RAID if using multiple drives).
If the drive is not recognized in BIOS, troubleshoot by checking connections, re-seating cables, or testing the drive in another system. Addressing detection issues early can save considerable time during the installation process.
Operating System Installation
The installation of an operating system on a SATA hard drive or SSD is a critical step in ensuring streamlined performance and optimal functionality. This section underscores the significance of correctly installing an OS, as it lays the groundwork for all subsequent computing activities. Failing to install the operating system properly can lead to complications such as slow boot times, file errors, and even system crashes. Understanding how to effectively manage this process not only simplifies user experience but also enhances the overall performance of the hardware.
Installing Windows on a SATA HDD/SSD
When it comes to installing Windows on a SATA drive, several phases need to be navigated. The first step involves creating a bootable USB or DVD that contains the Windows installation media. This can be achieved by using tools like the Microsoft Media Creation Tool, which allows users to download Windows directly from Microsoft's website. Once the installation media is prepared, follow these steps:
- Insert the bootable USB or DVD into your computer.
- Restart the computer and access the BIOS or UEFI settings. This usually involves pressing a specific key such as F2, F12, or Delete during startup.
- Change the boot order so the system can boot from the USB or DVD.
- Save and exit the BIOS, which will restart your PC.
- Follow the on-screen prompts to select your language, time, and keyboard preferences.
- Click "Install Now" and provide the necessary activation key if required.
- Choose the installation type — for a fresh install, select "Custom: Install Windows only (advanced)."
- Select the SATA HDD or SSD as the target drive for installation. At this point, formatting or partitioning the drive can be done if necessary.
This process ensures that Windows is installed on the chosen SATA drive with suitable drivers recognized from the get-go, fostering a smoother user experience afterwards.
Configuring Windows for Optimal Performance
After a successful installation of Windows on your SATA drive, the next task is to optimize the system settings for maximum efficiency. Here’s a comprehensive approach to ensure that Windows operates at its best:
- Update Drivers: Regularly check for driver updates, particularly for graphics, network, and SATA controller drivers. Updated drivers can boost system performance and stability.
- Adjust Power Settings: Go to Control Panel > Power Options. Opt for High Performance setting to ensure that your system utilizes resources effectively.
- Enable TRIM for SSDs: If using a SATA SSD, enabling the TRIM command should be a priority. Type in Command Prompt to check if TRIM is enabled. If it is not, use to enable it. This helps maintain SSD performance over time by allowing it to manage space better.
- Disk Defragmentation: While SSDs do not require defragmentation, HDDs will benefit from periodic defrags. Use the built-in Windows tool to schedule defragmentation of your SATA HDD regularly.
- Optimize Startup Programs: Review programs starting up with Windows. Right-click the taskbar, select Task Manager, then the Startup tab. Disable non-essential applications to enhance boot speeds.
Adhering to these steps can maximally utilize the capabilities of both SATA HDDs and SSDs, ultimately offering a responsive and efficient computing environment.
"A well-optimized operating system can significantly enhance your overall user experience, especially on SATA drives."
By conducting a proper installation of the operating system and taking steps for optimization, users can significantly increase the longevity and performance of their SATA drives.
Post-Installation Procedures
After connecting your SATA hard drive, there are critical steps to ensure the system recognizes the drive and can utilize it correctly. These post-installation procedures are vital. They not only pave the way for optimal functionality but also help prevent potential issues down the line. Understanding these steps can greatly enhance the user experience with new storage devices.
Disk Management in Windows
In Windows, disk management is a crucial aspect of maintaining your storage devices. After the installation of your SATA drive, you need to verify its presence in the system. You do this by launching the Disk Management tool.
- Accessing Disk Management: Right-click on the Start menu and select "Disk Management". This will bring up a list of all connected disks.
- Identifying Your Drive: Your new SATA hard drive may show up as unallocated space if it is not yet formatted. Windows identifies the drive with a label, usually as "Disk 1" or "Disk 2", depending on what you currently have.
- Assigning a Letter: To access the drive, it’s often necessary to assign a drive letter. Right-click on the unallocated space and select "New Simple Volume". Follow the wizard to assign a letter.
- Setting File System: Choosing the right file system for your needs is essential. NTFS is common for Windows users; however, if you desire compatibility with macOS, exFAT is a viable option.
By managing your drive effectively in Windows, you create a seamless pathway for data storage and retrieval.
Formatting the Drive
Formatting your new SATA hard drive is a significant step that prepares it for use. During formatting, the system sets up the file structure that will be used for organizing your data.
- Why Format?: Formatting helps in clearing any residual data and preparing the drive for immediate use. It also ensures that it functions well with the operating system's file system.
- Steps to Format: After accessing Disk Management, right-click on your new drive and select "Format". A dialog box will open, prompting you to choose a file system, allocation unit size, and volume label.
- Recommendations: Typically, for most users, the default settings work well. However, consider the size of the data being stored. Larger files may benefit from larger allocation unit sizes.
- Completing the Format: Once the options are selected, click "OK" or "Finish". The formatting process might take some time, depending on the drive size. After completion, the drive is fully operational and ready for data.
Formatting your drive correctly ensures longevity and performance at optimal levels.
The steps outlined above for post-installation are fundamental in preparing your SATA drive for both immediate and future use. Following these guidelines helps maintain an organized and efficient data storage system.
Troubleshooting Common Issues
In the realm of connecting SATA hard drives, troubleshooting common issues emerges as a crucial component. Understanding how to address potential problems not only ensures a more seamless installation experience but also prolongs the lifespan and efficiency of the hardware. The complexity of modern storage solutions can lead to certain hurdles, which, if left unchecked, may result in data loss or suboptimal performance. Therefore, this section delves into prevalent problems associated with SATA hard drives, providing insights and solutions that empower users to tackle issues proactively.
Drive Not Detected
One of the most common frustrations faced by users when connecting SATA drives is the dreaded situation of a drive not being detected by the system. This issue can originate from several factors, each requiring careful examination.
- Connection Issues: Often, loose or improperly connected cables can disrupt communication between the SATA drive and the motherboard. Ensure that both the data and power cables are securely connected and in good condition.
- BIOS Settings: Another critical element is the BIOS configuration. Sometimes, the SATA drive might not appear due to incorrect BIOS settings. Access the BIOS during startup to confirm that the drive is recognized. Look for options to enable AHCI mode, which optimizes the performance of SATA devices.
- Faulty Hardware: In some instances, the problem could be related to the drive itself or the SATA port on the motherboard. Testing the drive in another machine or using alternative SATA ports can help isolate the issue.
"Proper diagnosis and troubleshooting can save you from unnecessary upgrades and frustration."
Data Transfer Errors
Data transfer errors can significantly impact the efficiency and reliability of your SATA drives. When transferring files, encountering interruptions or errors can be distressing, leading to incomplete backups or corrupted data.
- Cable Quality: The quality of SATA cables plays a pivotal role in data integrity. Using high-quality, certified cables minimizes the incidence of data transfer errors. It's advisable to avoid excessively long or damaged cables that may introduce signal degradation.
- Drivers and Firmware: Outdated drivers or firmware can also contribute to transfer errors. Regularly updating SATA controller drivers and the firmware of your drives ensures compatibility and can resolve underlying bugs. This practice enhances system stability and overall performance.
- Checking for Malware: In some cases, malware can interfere with data transfers. Regularly scanning your system with trusted antivirus software can help eliminate these threats and keep your data safe.
By understanding these common issues and their solutions, users can navigate the complexities of SATA hard drives with greater confidence. Addressing problems early can prevent extensive troubleshooting later, leading to a more enjoyable computing experience.
Optimizing Performance
Optimizing performance is crucial when working with SATA hard drives, especially for those who demand high-speed operations from their systems. This section will delve into the key factors influencing performance, the benefits of solid-state drives (SSD) versus traditional hard disk drives (HDD), and the importance of regular maintenance routines.
Using SSD for Primary Storage
Solid-state drives have transformed data storage by providing superior performance for various applications. Unlike HDDs, SSDs use flash memory to store data, which significantly reduces access times compared to their mechanical counterparts. The speed advantage means faster boot times, quicker application launches, and improved file transfer speeds.
When selecting an SSD for primary storage, consider these points:
- Read and Write Speeds: Look for SSDs with high sequential read and write rates. Drives like the Samsung 970 EVO and Western Digital Black SN750 are known for their fast performance.
- Form Factor: Ensure your system supports the SSD form factor. M.2 drives offer a compact solution, whereas 2.5-inch drives may require a dedicated bay.
- Endurance Ratings: Check the drive's endurance to assess its lifespan, typically measured in terabytes written (TBW).
Using an SSD as primary storage is recommended for those who prioritize speed and responsiveness in their systems, particularly for gaming or intensive computations.
Regular Maintenance Routines
While SATA drives are generally reliable, implementing regular maintenance routines can help sustain performance and extend their lifespan. Here are several practices to consider:
- Check Disk for Errors: Use built-in tools like Windows Check Disk or third-party applications to identify and fix disk errors. Regular scans can prevent data loss.
- Disk Cleanup: Periodically remove unnecessary files and software that can clutter the drive. Windows has a built-in Disk Cleanup tool that can help simplify this process.
- Monitor Drive Health: Software such as CrystalDiskInfo can provide real-time data on the health of your SATA drives. Keep an eye on attributes like temperature and read/write errors.
- Firmware Updates: Manufacturers release firmware updates to improve performance and security. Periodically check for updates from your SSD or HDD manufacturer.
Maintaining SATA drives is not merely a guideline; it is a necessary task to keep your computing environment efficient and reliable. Regular attention to these details can lead to noticeable improvements in performance over time.
Future of SATA Technology
The future of SATA technology lies at an intriguing intersection of advancing data storage requirements and the ever-evolving landscape of technology. As we progress, understanding the potential directions SATA may take is essential. This is particularly vital for users who rely on efficient data management and streamlined storage solutions. Notably, SATA has been a cornerstone in the architecture of data storage since its inception, and its ongoing relevance must be highlighted as new technologies emerge.
Emerging Trends in Data Storage
In the realm of data storage, several emerging trends could shape the future of SATA technology. One notable trend is the demand for higher data transfer rates. As applications grow ever more data-intensive, users expect their storage solutions to keep pace. Recent advancements in SATA III have pushed speeds up to 6 Gbps, but the appetite for speed is unrelenting.
Moreover, the integration of cloud storage solutions is impactful. Users are increasingly leveraging cloud services, leading to new hybrid solutions that blend local storage with cloud-based data management. This evolution challenges traditional SATA usage but also presents opportunities for its adaptation.
Additionally, user preferences are shifting towards SSDs over traditional HDDs. As price points for SSDs continue to decrease, more consumers are opting for these faster storage alternatives. SATA connections remain integral in SSD deployment, guiding the focus for continued improvement in SSD technology and SATA interfaces.
Alternatives to SATA
While SATA technology has its strengths, it is wise to consider upcoming alternatives gaining traction. NVMe (Non-Volatile Memory Express) is one such contender. NVMe utilizes PCIe (Peripheral Component Interconnect Express) lanes, vastly outperforming SATA in data transfer speeds and reducing latency. As such, NVMe is becoming the standard for high-performance SSDs, further distancing itself from traditional SATA frameworks.
Another important alternative is SAS (Serial Attached SCSI), especially in enterprise environments where reliability and performance are paramount. SAS offers higher speed, improved data integrity, and robust error correction features, making it suitable for demanding applications. While SATA remains popular, these alternatives are increasingly influencing the future landscape of data storage.
"Understanding the evolution of storage technologies enables users to make informed decisions for both current and future needs."
Closure
The conclusion of this guide illustrates the significance of understanding SATA hard drives and their installation. It highlights how mastering these fundamental principles is critical for optimizing data storage solutions. The growing reliance on digital data storage in various sectors emphasizes the need for users to be competent in connecting and managing SATA devices effectively.
Summary of Key Points
- Diverse SATA Formats: SATA has evolved through different versions, each improving upon the last in terms of speed and performance capabilities.
- Types of Drives: Users can choose from SATA HDDs, SSDs, and hybrid drives, each catering to different storage requirements.
- Installation Process: Understanding the installation process, from locating SATA ports to securely mounting drives, is essential.
- BIOS Configuration: Proper BIOS setup is crucial for ensuring the system recognizes newly installed drives.
- Post-Installation Management: Familiarity with Windows Disk Management facilitates the effective utilization of installed drives.
- Troubleshooting: Awareness of common issues and solutions ensures smoother operations.
Final Thoughts
As technology evolves, SATA drives remain relevant due to their balance between performance, capacity, and cost. For anyone invested in managing or upgrading their computing system, familiarity with SATA technology is invaluable. It opens doors to improved data management practices, better system performance, and an understanding of future technological trends.
By grasping these concepts, users can make informed choices about their storage solutions and effectively navigate the complexities of modern data storage.


